
When I started learning cybersecurity, I realized very quickly that watching tutorials was not enough. I needed a place to practice, somewhere I could test tools, make mistakes, and learn safely.
That is where building a virtual lab came in.
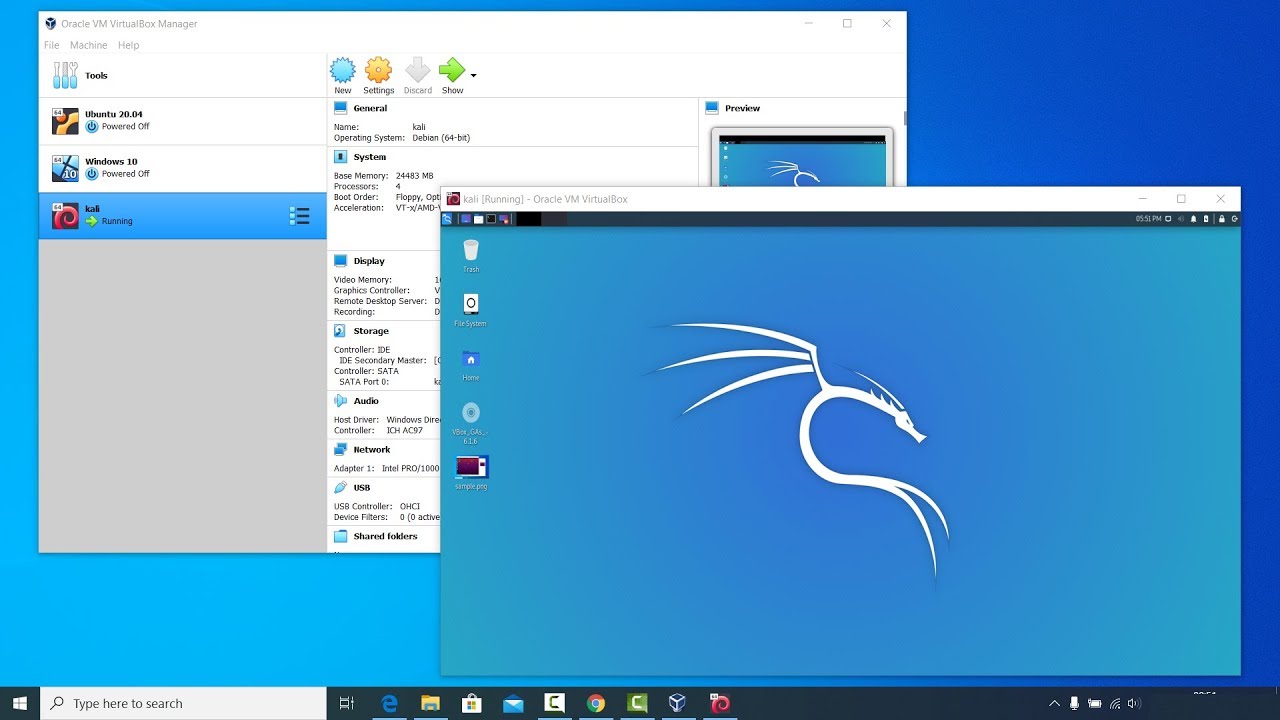
Instead of using real machines or touching a live network, I created a small practice environment on my laptop using Oracle VM VirtualBox.
If you are getting into ethical hacking or penetration testing, this is one of the best places to start.
What is a Virtual Lab
A virtual lab is simply a group of virtual machines running on your computer that you can use for testing.
Think of it like having multiple computers inside one computer.
In my case, I used:
Kali Linux as my attacker machine
Metasploitable 2 as my target machine
Oracle VM VirtualBox to run everything
This setup let me practice scanning ports, identifying services, and running basic exploits in a controlled environment.
Why I Built One
I wanted a safe place to learn without worrying about breaking anything.
A virtual lab helped me practice legally and safely.
It helped me understand how machines communicate.
It helped me learn how penetration testing tools work.
Most importantly, it helped me build hands on skills instead of only reading theory.
It also made cybersecurity feel real.
Setting Up VirtualBox
Installing VirtualBox was straightforward.
Once it was installed, I created two virtual machines.
The first was Kali Linux, which I gave enough RAM and storage to run security tools smoothly.
The second was Metasploitable 2, which is intentionally vulnerable and designed for practice.
The important part was putting both machines on the same private network using a Host Only Adapter.
That allowed them to communicate with each other while staying isolated from my real network.
That isolation matters.
Steps I Used to Install My Virtual Lab Machines
Setting up the lab was easier than I expected. I started with two machines inside Oracle VM VirtualBox: one attacker machine and one vulnerable target.
1. Install VirtualBox
First, I downloaded and installed Oracle VM VirtualBox on my computer.
After installation, I opened VirtualBox and made sure it launched properly.
2. Installing Kali Linux
- Download Kali Linux
I downloaded the ISO file for Kali Linux.
I used the installer image so I could create the machine from scratch.
- Create a New Virtual Machine
Inside VirtualBox:
Click New
Enter a machine name such as Kali Linux
Select:
Type: Linux
Version: Debian 64 bit
Click Next.
- Allocate Resources
I assigned:
RAM: 4 GB
CPU: 2 processors
Disk: 30 GB dynamically allocated
Then I attached the Kali ISO file as the startup disk.
- Install Kali Linux
Start the machine.
Choose Graphical Install.
Follow the prompts:
Select language
Set username and password
Configure disk partitioning
Install the operating system
Finish and reboot.
Kali was ready.
Installing Metasploitable 2
1. Download Metasploitable 2
I downloaded Metasploitable 2 as a prebuilt virtual machine.
It usually comes as a compressed file or OVA appliance.
2. Import the Machine
In VirtualBox:
- Click File
- Select Import Appliance
- Choose the Metasploitable OVA file
- Click Import
Wait for it to finish.
- Adjust Resources
I gave it:
RAM: 1 GB
CPU: 1 processor
That was enough for practice.
- Start the Machine
Power on the virtual machine.
It boots into a Linux login screen.
Default credentials are commonly:
Username: msfadmin
password: msfadmin
Now the target machine was running.
Configure Networking
Put Both Machines on the Same Network
This is important.
For Kali and Metasploitable:
- Open Settings
- Go to Network
- Choose Adapter 1
- Set Attached To:
- Host Only Adapter
Do this for both machines.
This lets the machines talk to each other while staying isolated from your real network.
Test the Lab
Verify Connectivity
From Kali, test communication:
ping <metasploitable-ip>You can also identify the target IP
ifconfig
or
ip a
If ping works, your lab is ready.
First Practice Scan
Run Nmap
Use Nmap to test:
nmap -sV <target-ip>Now you have a working pentesting lab.
Attacker machine installed.
Target machine installed.
Network configured.
Ready for practice.